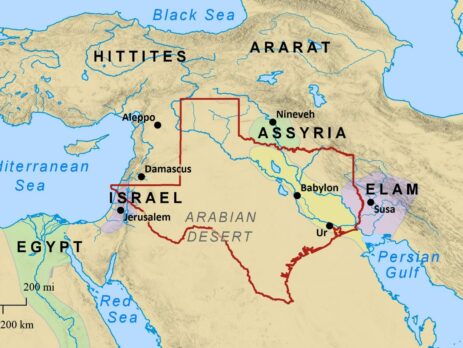
Unleashing Creativity: Designing Stunning Digital Bible Maps from Scratch
In the digital age, technology has opened up exciting possibilities for engaging with the Bible in new and creative ways. One such avenue is the art of designing stunning digital Bible maps from scratch. These maps provide a visual and interactive medium to explore the biblical narrative, offering a deeper understanding of the geography, journeys, and events recorded in the sacred texts. Unleashing your creativity in this endeavor can lead to captivating and immersive maps that breathe life into the ancient stories. In this article, we will explore the steps to create breathtaking digital Bible maps from scratch.
Step 1: Embrace the Vision
Every great project starts with a vision. As you embark on designing your digital Bible map, envision the experience you want to create for your audience. Consider the themes, stories, or events you wish to focus on and how you can translate them into a visually compelling and informative map. Embrace your creativity and allow your passion for the Bible’s narratives to guide you in this process.
Step 2: Research and Gather Data
To design an accurate and meaningful digital Bible map, thorough research is key. Dive into biblical texts, historical sources, atlases, and commentaries to gather relevant data about the locations, geographical features, and journeys you want to include on your map. The more comprehensive your research, the richer and more informative your map will be.
Step 3: Choose the Right Tools
Selecting the right tools for your map-making process is essential. Various software options are available to cater to different skill levels and preferences. Beginners may opt for user-friendly online mapping tools like Google My Maps or Mapbox, while those with more experience may prefer Geographic Information System (GIS) software such as QGIS or ArcGIS Pro, offering advanced customization and analysis capabilities.
Step 4: Design the Layout
With your vision and data in mind, begin sketching the layout of your digital Bible map. Consider the color scheme, iconography, and overall design aesthetic that will best complement the biblical context. Create a visual hierarchy that highlights the main points of interest and guides the viewer’s eye through the map.
Step 5: Organize and Prepare Data
Organize your data in a structured manner to facilitate its integration into the mapping software. Create a spreadsheet or database with the necessary information, such as place names, coordinates (latitude and longitude), and relevant biblical references. This preparation will streamline the mapping process.
Step 6: Customize and Beautify
Once you’ve imported your data into the mapping software, it’s time to unleash your creativity. Customize the map’s visual elements, such as markers, symbols, and lines, to represent the biblical locations and events accurately. Use colors, textures, and fonts to add depth and beauty to your map. Pay attention to details, as they can significantly enhance the overall aesthetics of the map.
Step 7: Add Interactive Elements
Take advantage of the digital medium by incorporating interactive elements into your Bible map. Consider adding clickable markers that reveal more information about specific locations or events. Incorporate pop-up boxes with relevant Bible verses or historical context to enrich the viewer’s understanding.
Step 8: Seek Feedback and Iterate
As you work on your map, seek feedback from others, such as friends, colleagues, or potential users. Consider their suggestions and critiques to improve your map’s design and functionality. Iterative feedback is crucial in refining your map and ensuring it effectively communicates the biblical narrative.
Step 9: Test for Usability
Before sharing your completed digital Bible map, thoroughly test its usability and functionality. Ensure that all interactive elements work smoothly and that the map is easy to navigate. Test it on different devices and screen sizes to ensure its responsiveness.
Step 10: Share and Inspire
Once your stunning digital Bible map is ready, share it with the world! Publish it on your blog, website, or social media platforms to inspire others and provide them with a new and engaging way to explore the Bible’s stories. Encourage feedback and interaction from users, fostering a community of Bible enthusiasts eager to learn from your creative endeavor.
Designing stunning digital Bible maps from scratch is an exciting and rewarding journey that allows you to unleash your creativity and passion for the Bible. Through comprehensive research, thoughtful design, and interactive elements, your map can transform the ancient narratives into a captivating and immersive experience for modern audiences. As you embark on this creative endeavor, remember to embrace your vision, seek feedback, and continuously refine your masterpiece. By crafting breathtaking digital Bible maps, you contribute to the ever-evolving landscape of biblical engagement in the digital age.

